Apply An Inventory Count #
By the end of this chapter, you will be able to:
- Create an inventory count.
- Run a reconciliation report to identify any discrepancies in your count (if any).
- Confidently apply an inventory count.
Video Transcript: Count & Apply Your Inventory
There are 3 steps required to create an inventory count.
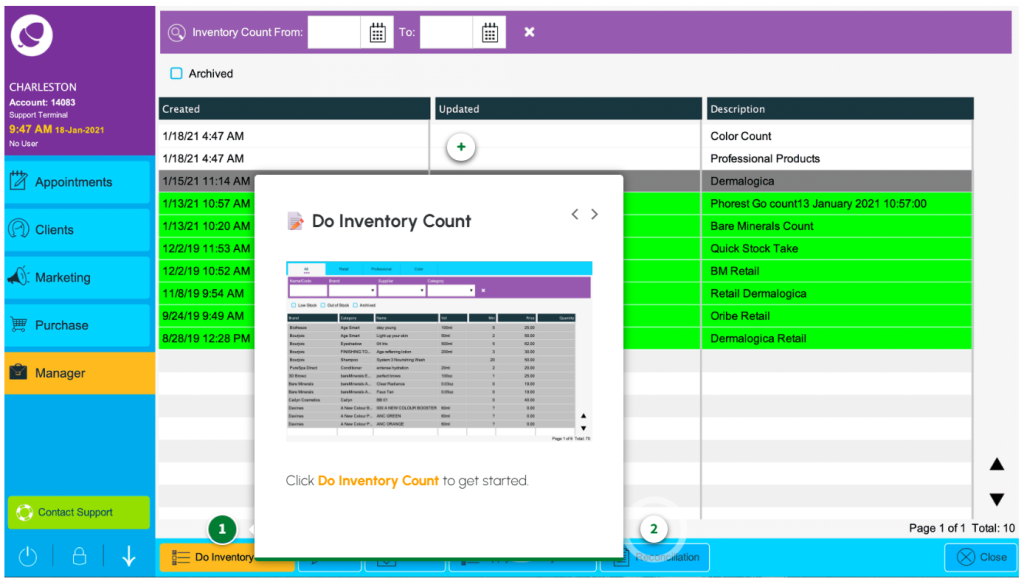
Step 1 is to create and describe your new count.
Use any of the on-screen filters if you want to create a specific count.
There are three ways to update the quantities:
- Click once in the Quantity column, followed by Edit and use the calculator.
- Double click in the Quantity field and use the calculator.
- Click once, then use your keyboard to update the quantity and press the downwards facing arrow key to move on to the next row.
Once you’re happy with your count, click Save.
As this is a new count, you will receive a prompt to apply the count now. This would skip step 2 and go straight to 3, so for now, click No.
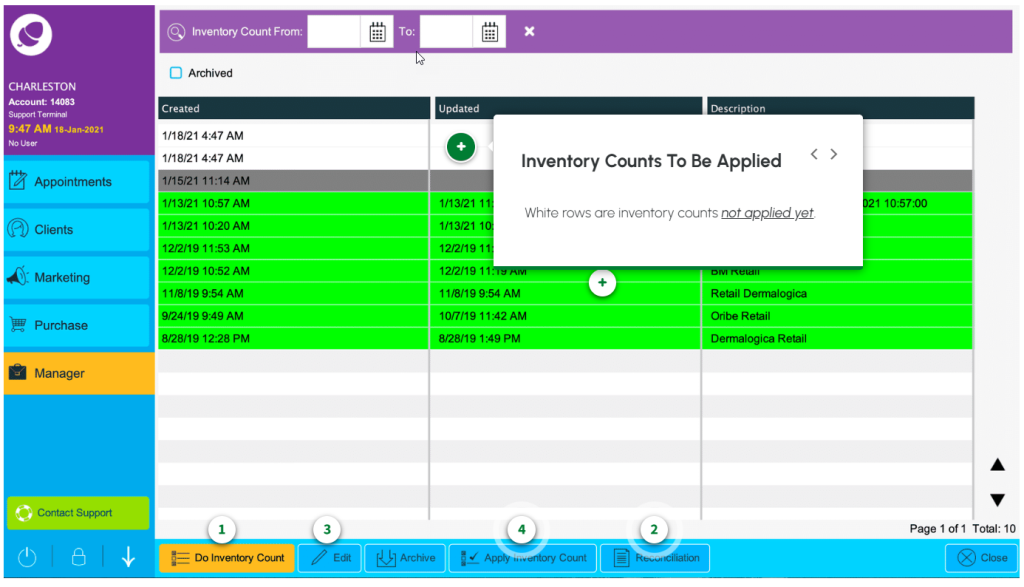
Your new inventory count appears in white at the top of the screen with a timestamp.
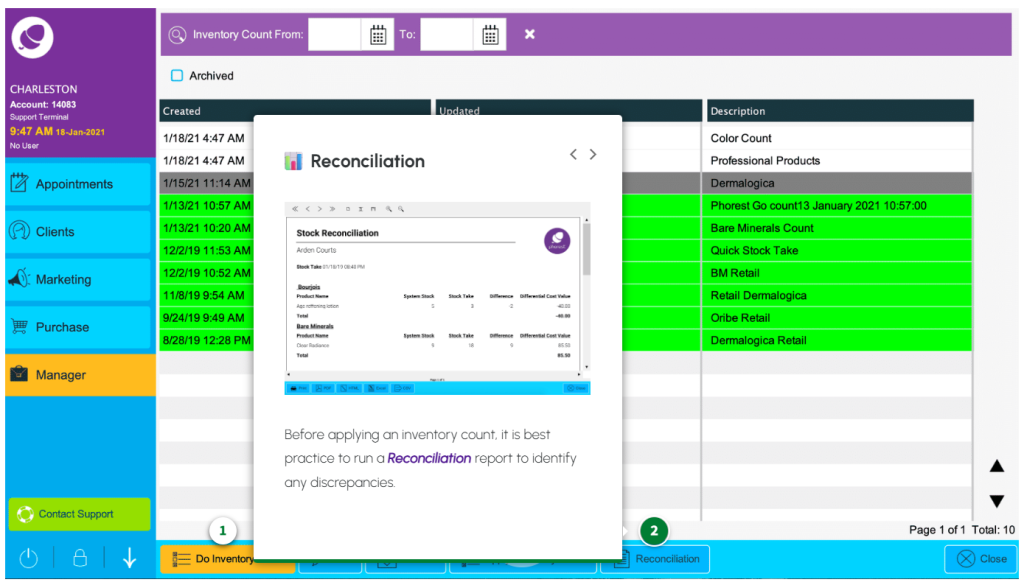
For Step 2 we want to run a Reconciliation report before applying the count. This allows you to identify any possible discrepancies first.
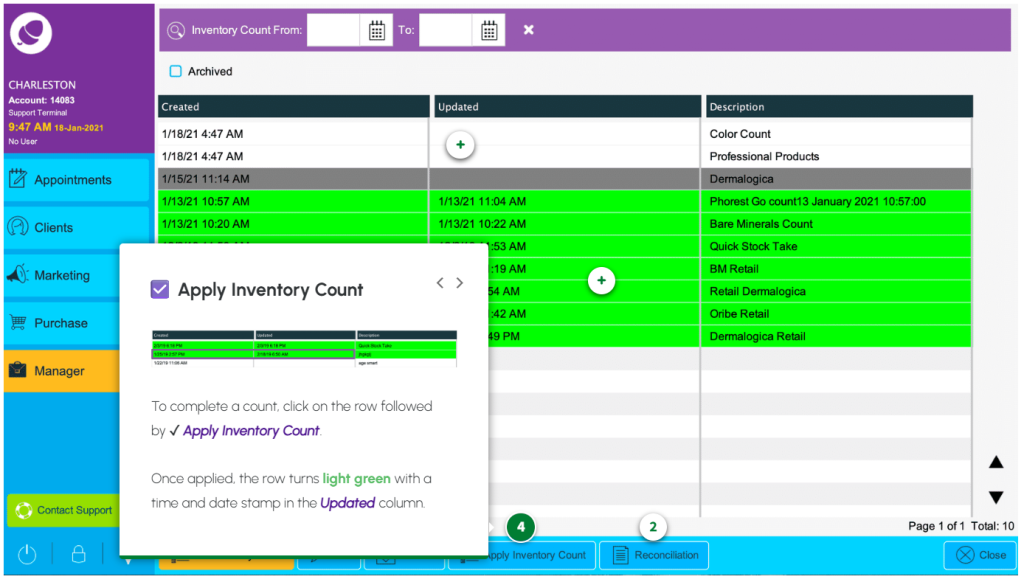
Once you’re happy there are no discrepancies between this report and your count we can progress to step 3; Apply the Inventory Count.
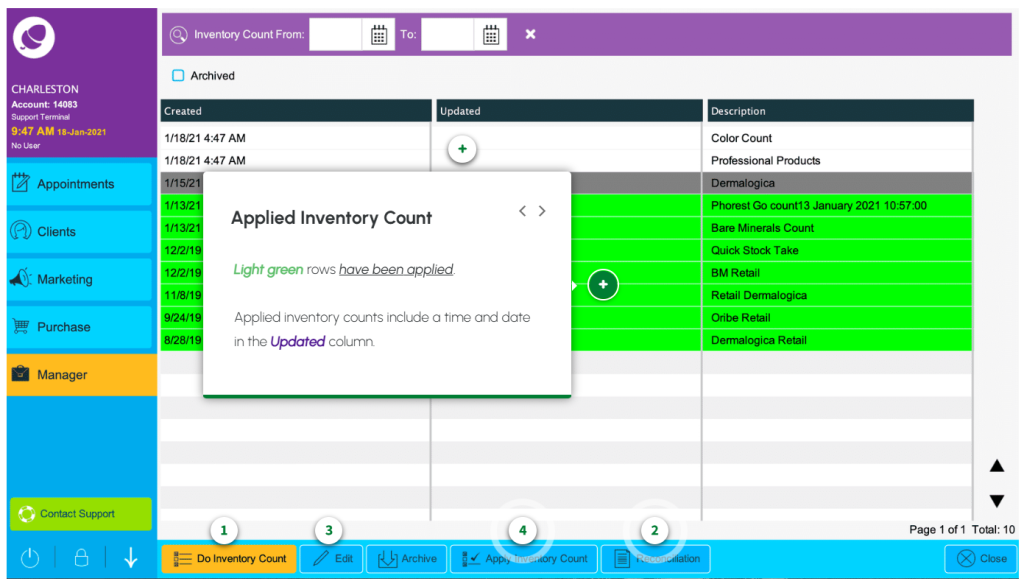
Once applied, your count turns green and a timestamp is added to the Updated column.
Count Inventory With Phorest Go #
Inventory Made Easy with Phorest Go #
Not only does Phorest Go make inventory counting effortless, but it contributes towards your salon going paperless, saves you time ⏱ , and means all of your information is stored directly on your desktop.
If you’re not already using Phorest Go, make sure you download it first: http://hyperurl.co/4o6ue2. Then check out the step-by-step video below to start creating inventory counts on the go.
NOTE: In the video below, Inventory is referred to as Stock, and Inventory Count is referred to as Stocktake.
Video Transcript: Inventory Count with Phorest Go
Do an inventory count on the move with Phorest Go.
Give your new count a name and select the type of products you want to include; retail, professional, or color products.
Next, choose the brands you’re counting. Pick specific brands or select them all to start the inventory count.
If this is your first time, you must grant Phorest Go permission to use your camera.
Start scanning your items to update the quantity.
Don’t worry if Phorest Go doesn’t recognize a barcode; you can search for the product brand or name and find it from your inventory list. Once you add the product and quantities, Phorest will update the product’s barcode.
If you need to, you can pause a count at any time. Tap Resume Inventory Count to pick up where you left off.
Don’t worry about adding duplicate products; Phorest Go will recognize this and let you know.
If you find a product that doesn’t have a barcode, you can manually add it to the count. Again, search the brand and product name, then enter the quantity.
Once you’ve added your last product, tap Review Inventory Count.
You should see a list of your counted and uncounted products. You can include notes to the count from here, too, which will show on your reconciliation report.
Once you’re done, Finish off your Inventory Count.
Head back to the desktop to complete the final two steps:
Then Apply the Inventory Count.
Run a Reconciliation report in Manager > Inventory Count to identify any possible discrepancies.
Inventory Count Screen #
Navigate the Inventory Count Screen #
Keep your product levels up-to-date and reconciled on the Inventory Count screen. From here, you will view, edit, and apply regular inventory counts and reconciliation reports to identify discrepancies.
Click the glowing purple arrow icons ‘< >‘ on the image below to navigate the Inventory Count screen.
Inventory Counts to be Applied #
Applied Inventory Count #
Do Inventory Count #
Reconciliation #
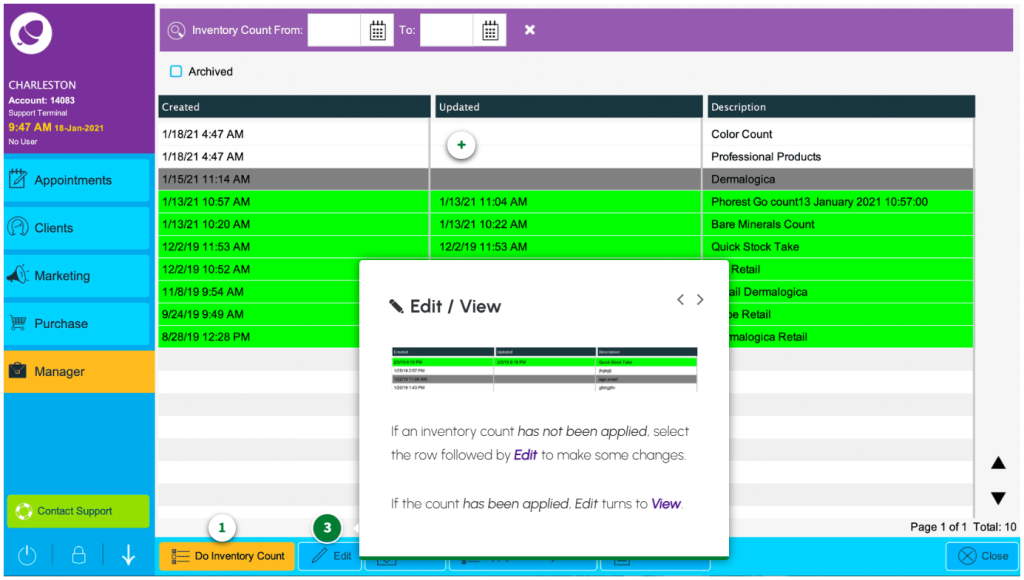
Edit / View #
Apply Inventory Count #